In today’s digital age, social media platforms like Facebook play a significant role in our lives. Whether you’ve recently undergone a name change or simply want to update your profile with a nickname, changing your name on Facebook is a relatively straightforward process. In this comprehensive guide, we’ll walk you through the steps to change your name on Facebook, whether you’re using a desktop browser or the Facebook mobile app.
Understanding Facebook’s Name Change Policy
Before diving into the process of changing your name on Facebook, it’s essential to understand the platform’s name change policy. While Facebook doesn’t require users to use their full legal names, there are certain rules and guidelines to follow:
- Preferred Name Usage: Facebook encourages users to use the name they go by in everyday life.
- Prohibited Elements: Names cannot include symbols, numbers, unusual capitalization, repeating characters, or punctuation. Additionally, titles of any kind, offensive or suggestive words, and phrases instead of a name are not allowed.
- Nicknames: Facebook allows the use of nicknames for first or middle names, as long as they are variations of your actual name (e.g., Abby instead of Abigail).
- Impersonation: Impersonating other users is strictly prohibited on Facebook. Profiles are intended for individual use only, and businesses should create separate business pages.
How to Change Your Name on Facebook via Desktop Browser
Changing your name on Facebook through a desktop browser is a simple process. Follow these steps:
- Log in to Facebook: Visit the Facebook website and log in to your account using your credentials.
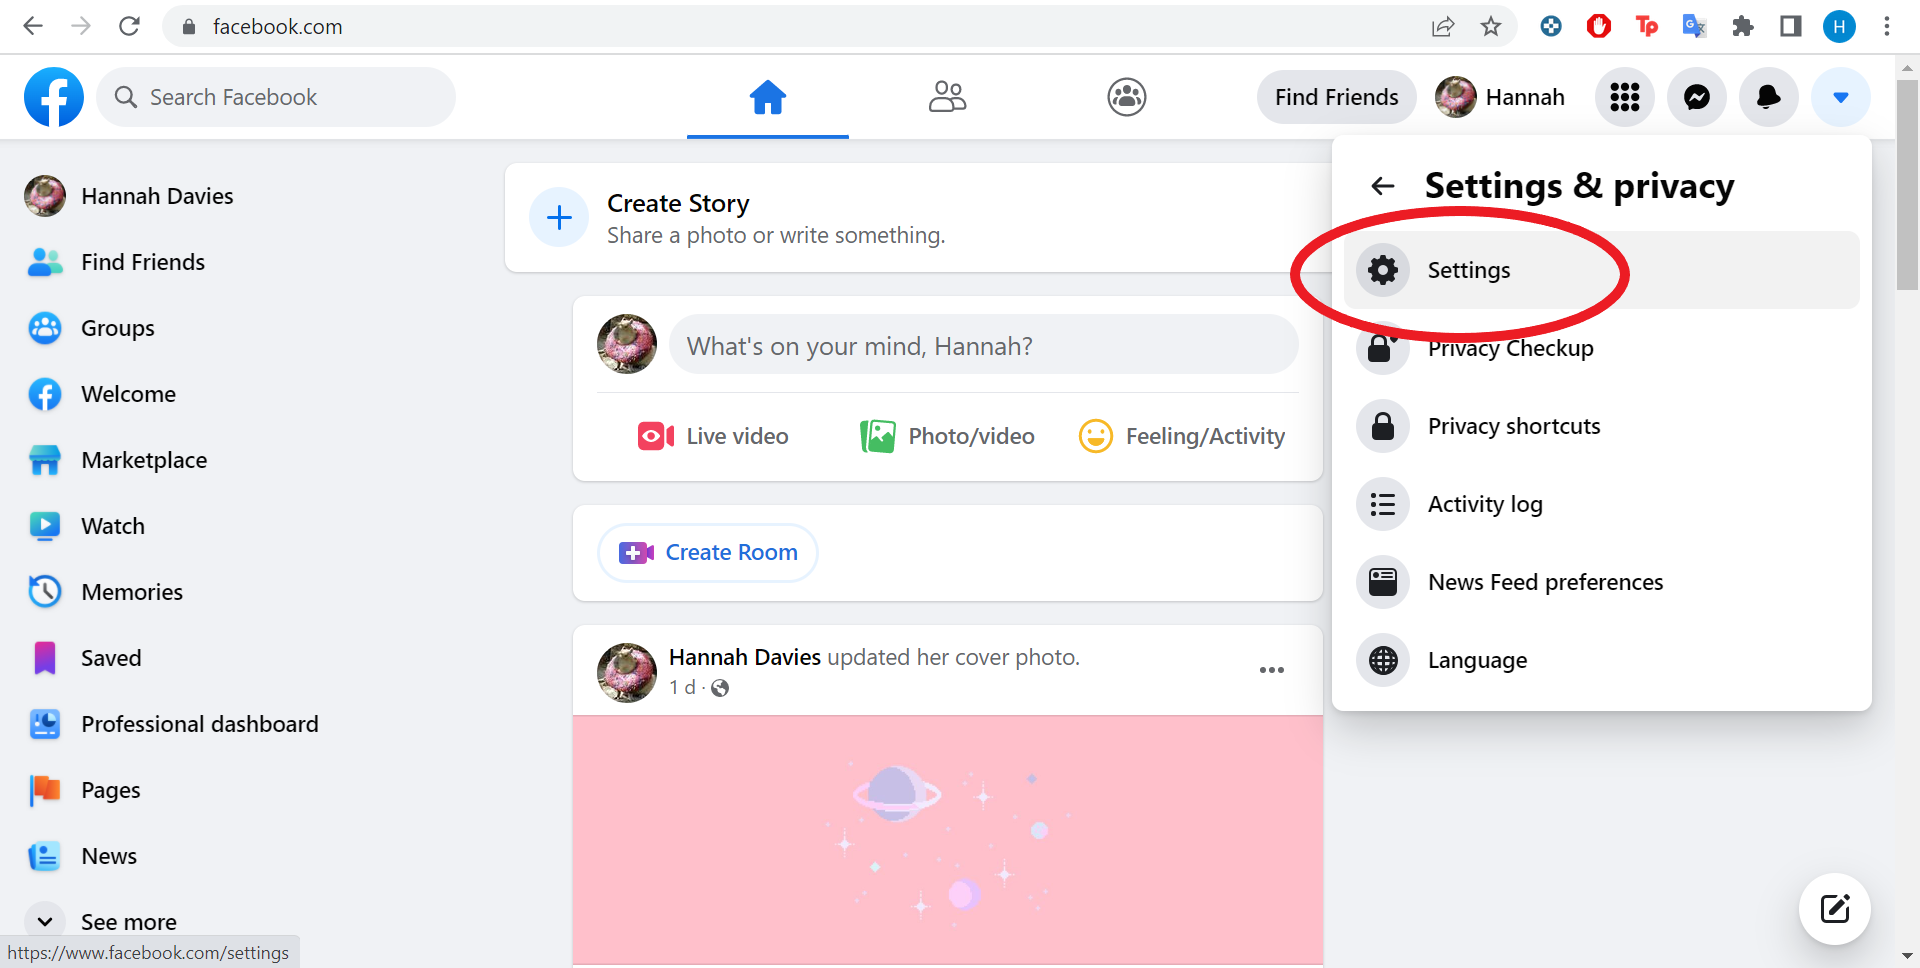
- Access Settings: Click on the downward arrow located at the top-right corner of the screen to access the dropdown menu. Then, select “Settings & Privacy” followed by “Settings.”
- Navigate to Accounts Center: In the left-hand menu, select “See More in Accounts Center.”
- Select Your Profile: Your Facebook profile will be displayed. If you have an associated Instagram account, it will also appear here.
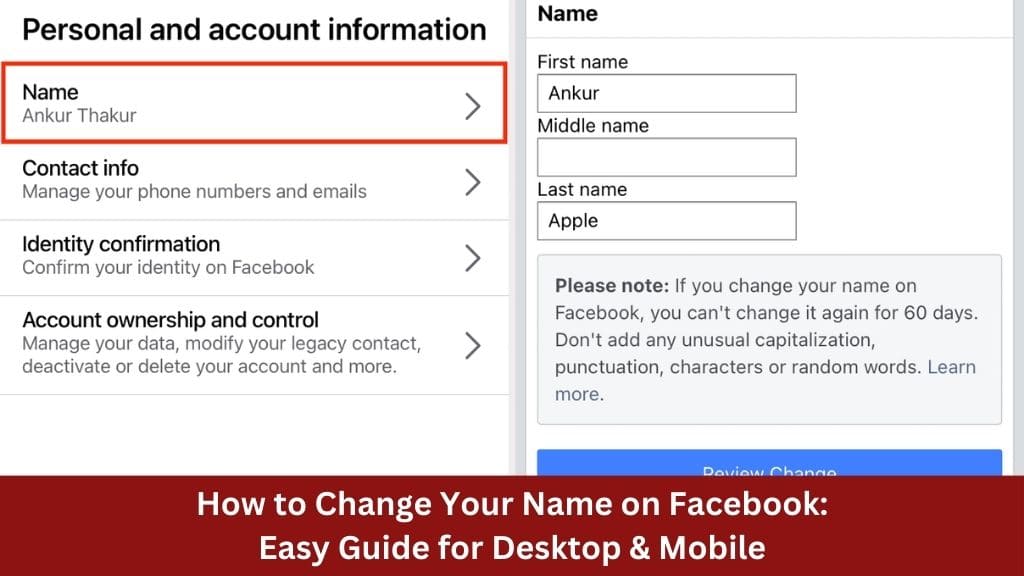
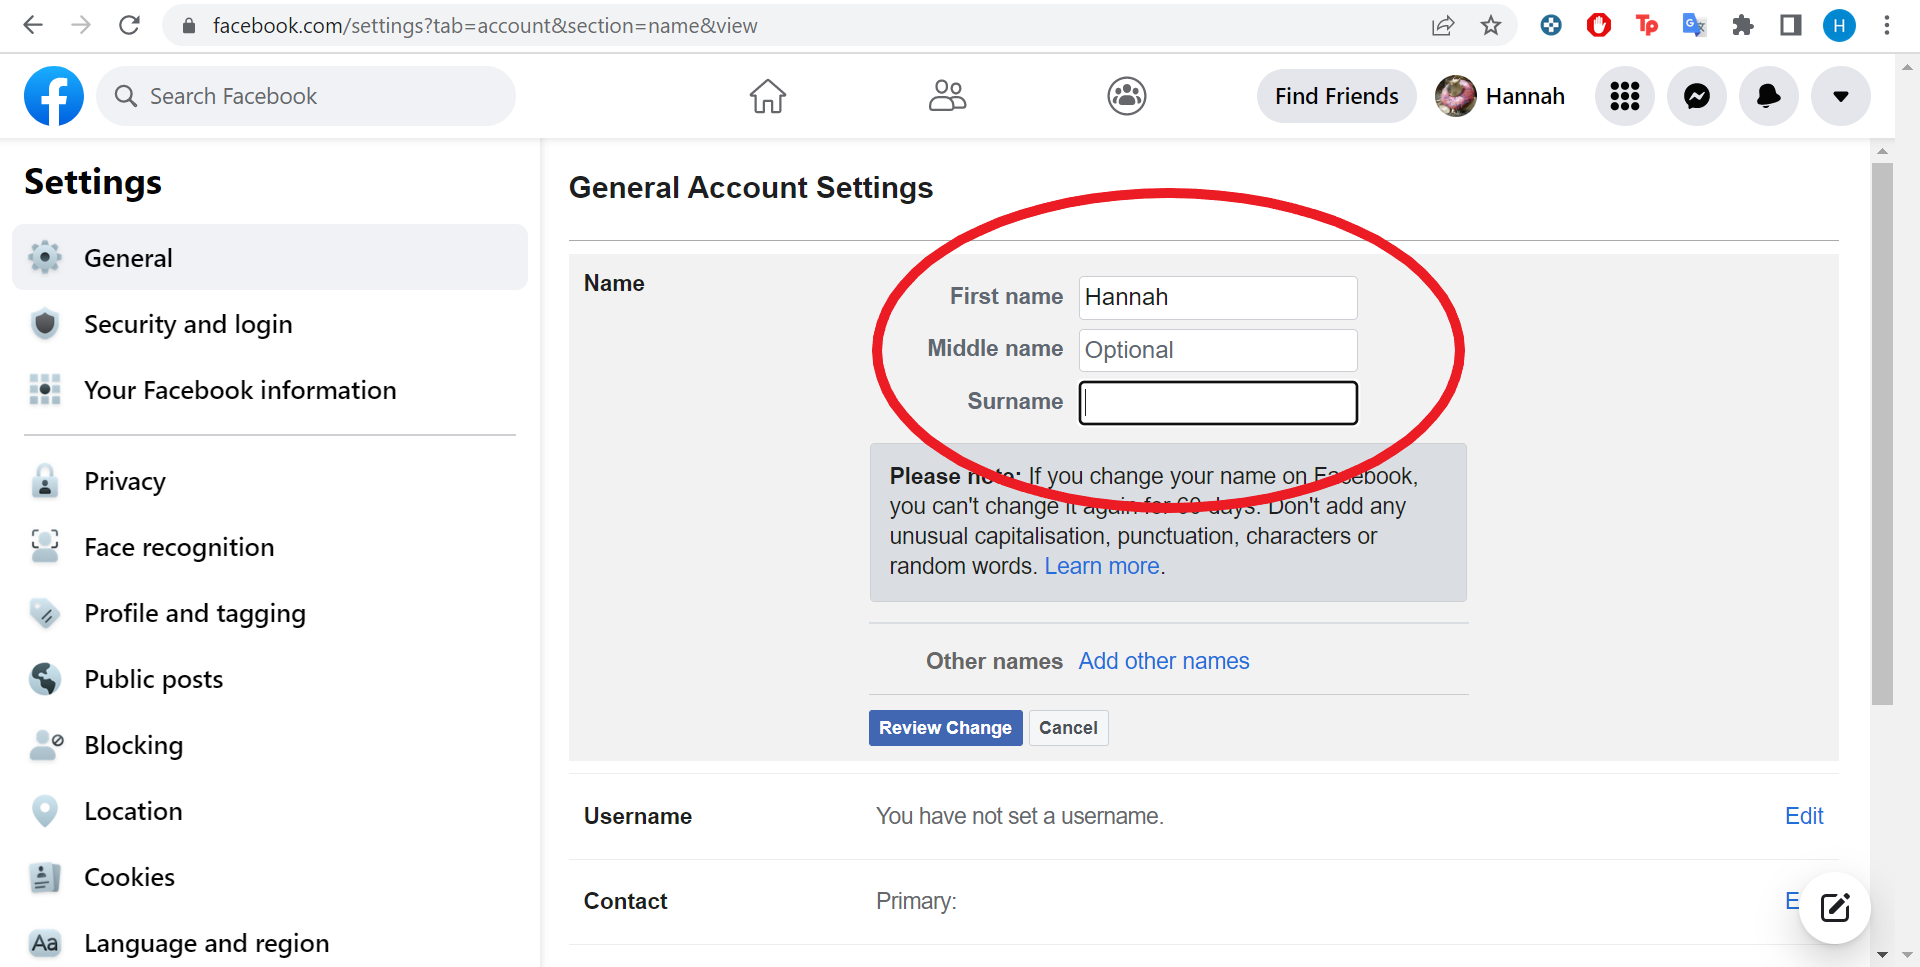
- Update Your Name: Click on “Name” and enter your new desired name. Once done, save your changes.
How to Change Your Name on Facebook via Mobile App
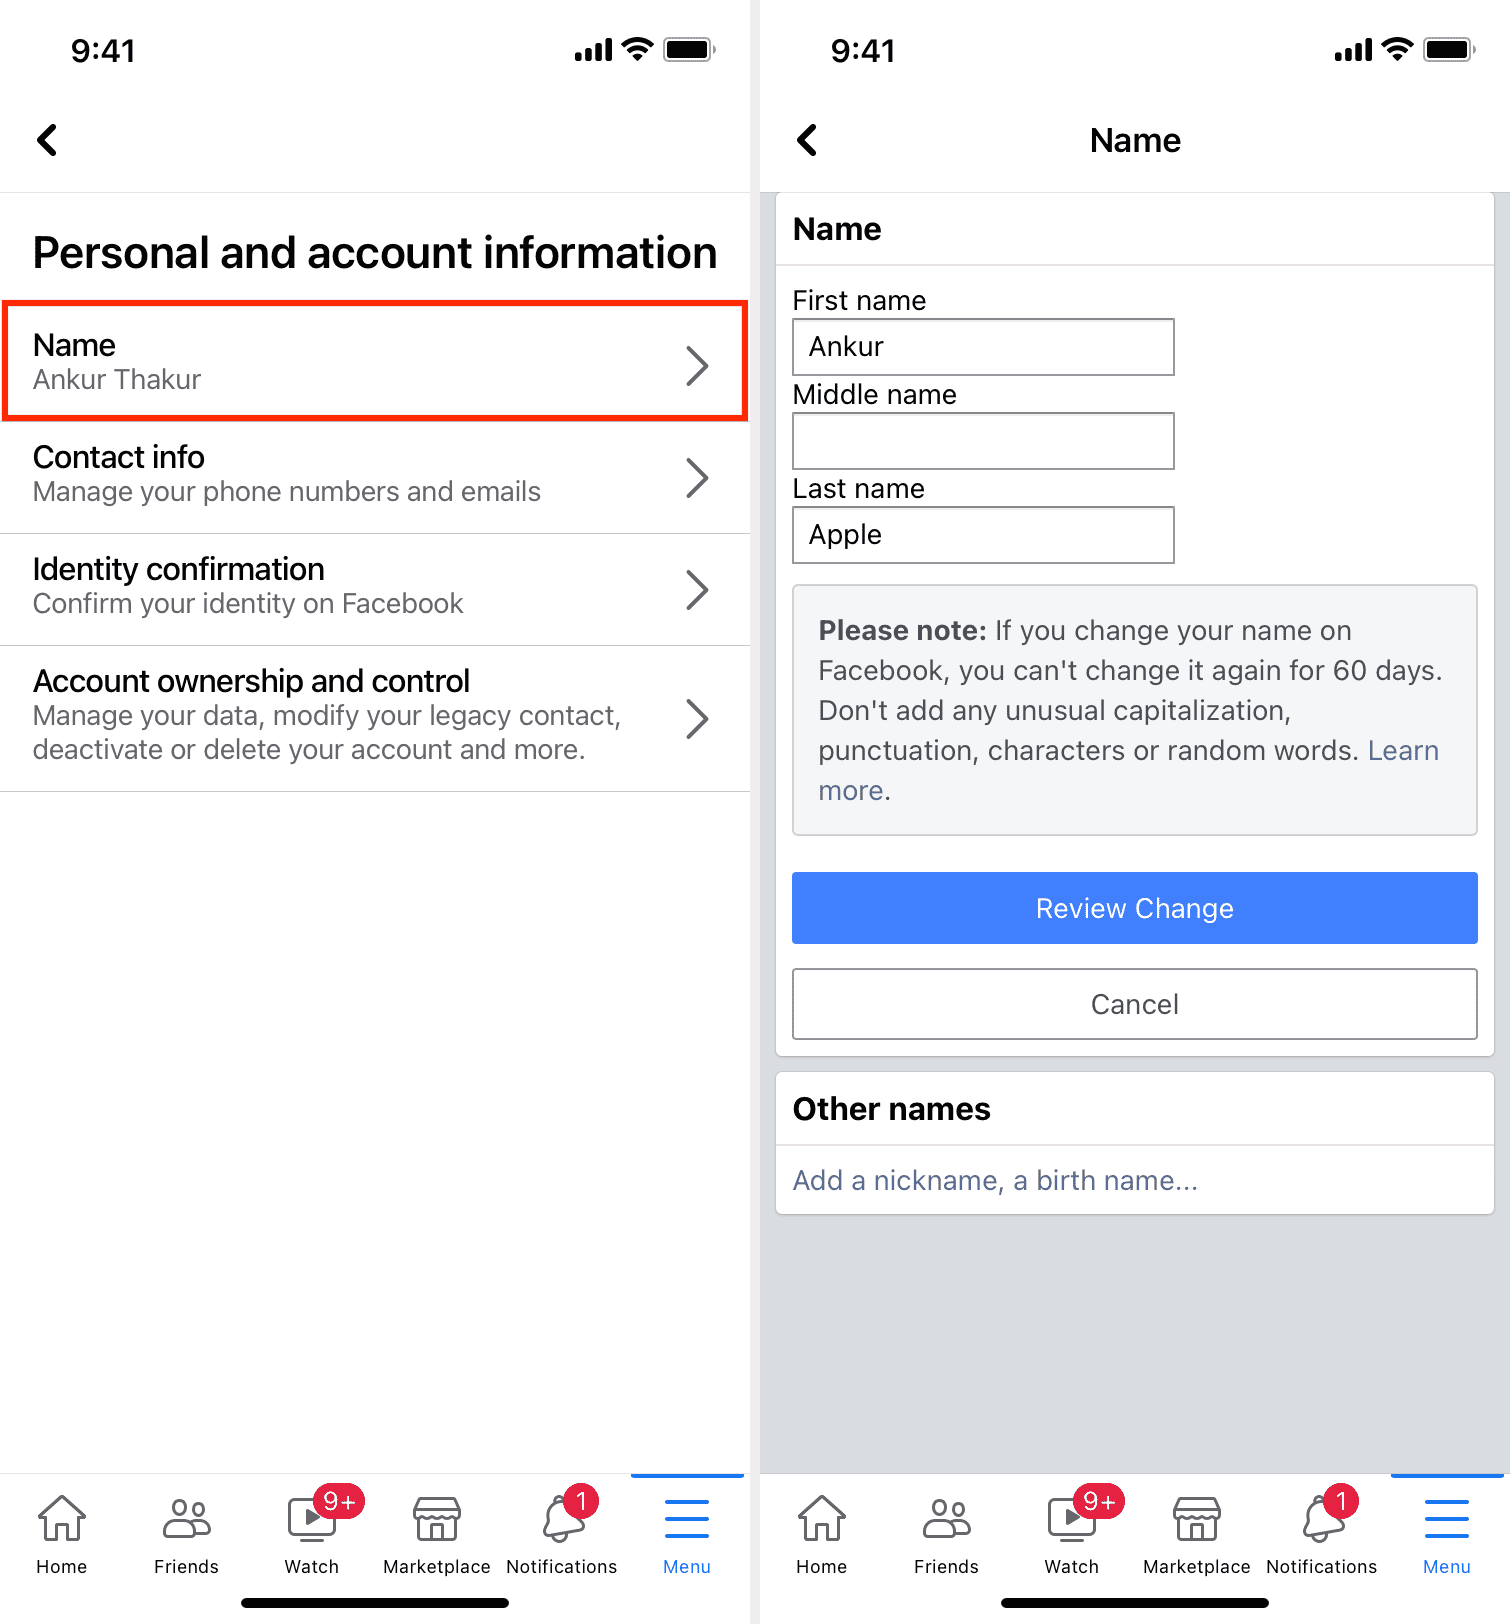
Changing your name on Facebook using the mobile app is equally straightforward. Here’s how to do it:
- Open the Facebook App: Launch the Facebook app on your iPhone or Android device.
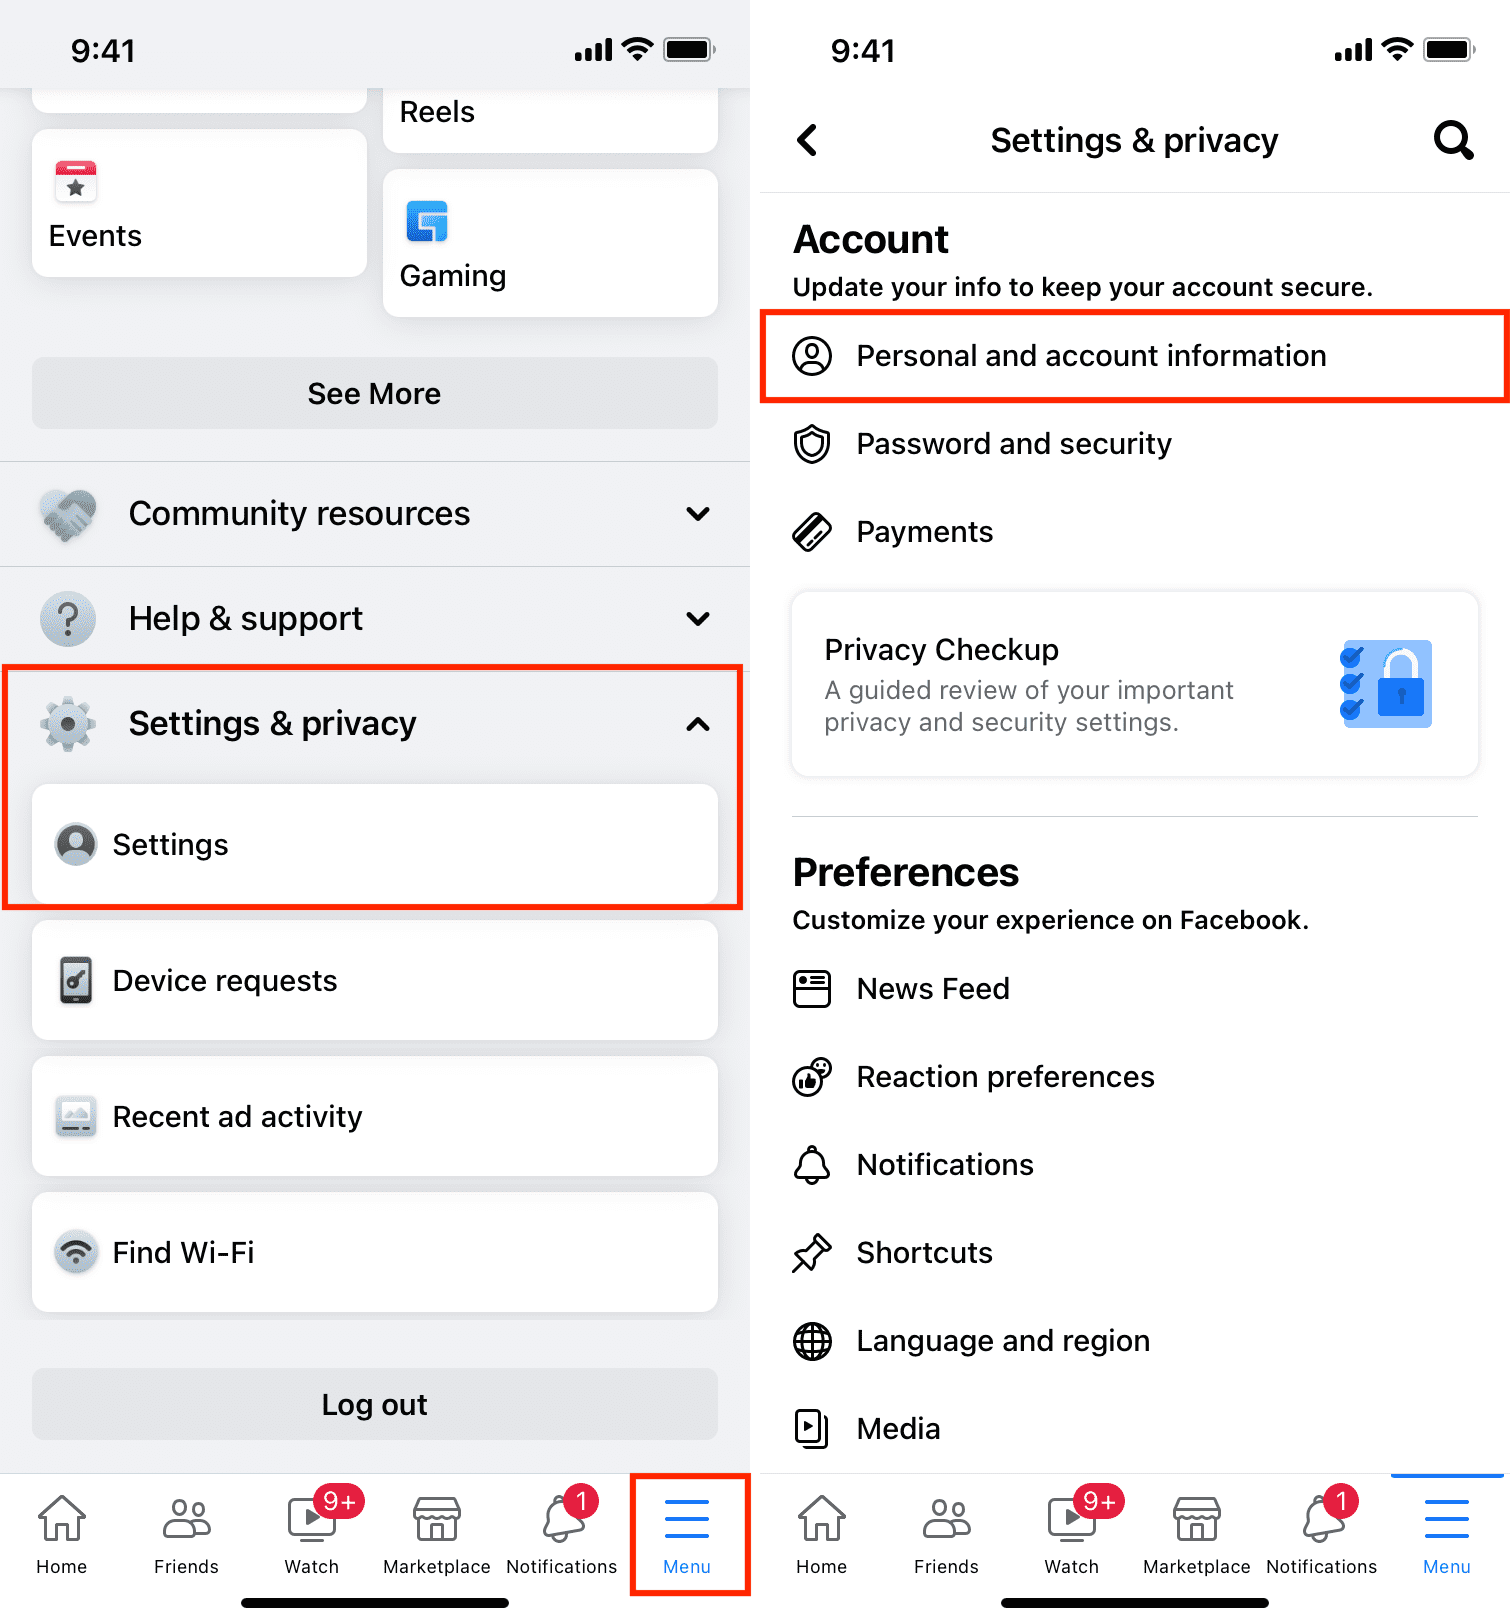
- Access Settings: Tap on the Menu icon located at the bottom-right corner (iPhone) or top-right corner (Android) of the screen. Scroll down and select “Settings & Privacy,” then choose “Settings.”
- Navigate to Accounts Center: Tap on “See more in Accounts Center.”
- Select Your Profile: Your Facebook profile will be listed under “Profiles.”
- Update Your Name: Tap on “Name,” enter your new desired name, and tap “Review Change.” Finally, tap “Save Changes” to confirm.
Adding a Nickname on Facebook
If you want to add a nickname to your Facebook profile, follow these steps:
- Open the Facebook App: Launch the Facebook app on your mobile device.
- Access Settings: Tap on the Menu icon, scroll down, and select “Settings & Privacy,” then choose “Settings.”
- Navigate to Accounts Center: Tap on “See more in Accounts Center.”
- Select Your Profile: Under “Profiles,” tap on “Name.”
- Manage Other Names: Tap on “Manage other names” and select the type of name (e.g., nickname) you want to add.
- Enter Your Name: Enter your nickname and save the changes.
Changing your name on Facebook allows you to keep your profile up-to-date with your current identity. Whether you’re updating your name due to a life event or simply want to add a nickname for personalization, following these steps will ensure a smooth transition. Remember to adhere to Facebook’s name change policy and guidelines to maintain a positive user experience for yourself and others on the platform.